Choose a model or use Auto
The model selector controls which available model answers your request. Choose Auto when you want ChatterMate to select a model, or use the picker when you want a particular available model.
Watch the walkthrough
Section titled “Watch the walkthrough”Read the video transcript
Let's compare two answers to the same question. Open the model picker beside the message box, then expand Individual models to see the choices your account offers.
Select two models. Notice that the picker now shows both choices and switches to Comparison mode. Where available, you can compare up to four models at once.
Write one clear prompt and send it once. Each selected model gets that same request, giving us a useful comparison without changing the question between answers.
The responses are labeled by model. Try Grid view to read them side by side, or switch between the model tabs when you want more room for one answer.
Which answer fits the task better? Check the accuracy, clarity, and whether it followed your instructions. Then copy the result you prefer, and refine it if needed.
Make a choice
Section titled “Make a choice”- Open the model selector near the message box.
- Review the available choices and any access labels.
- Choose Auto or an available model.
- Check the selection before sending your request.
Use a concise sample request when comparing results. Judge the answers against your actual task: accuracy, useful detail, clarity, and whether they follow the requested format.
The model list can change as providers and account access change. Use the current picker rather than a saved list of model names. A locked model does not become available simply because you include its name in a prompt.
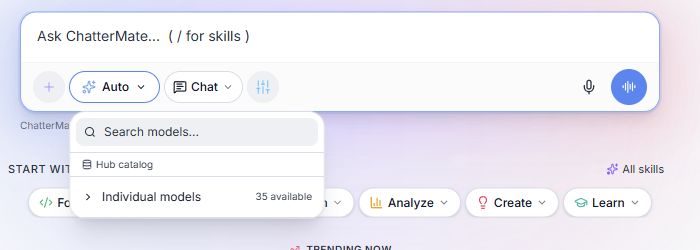
Open the selector first, then expand Individual models to inspect choices.
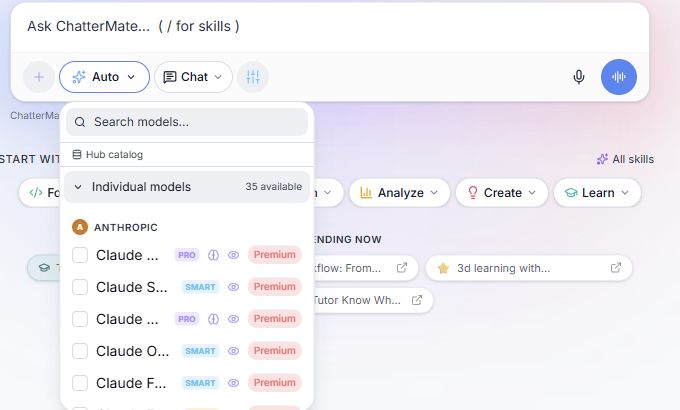
This local catalog is an example. Names, access labels, and available models can change.
Compare multiple models
Section titled “Compare multiple models”Use comparison when you want different approaches to the same task. ChatterMate lets you select two to four text models, where available, and send one prompt to all of them.
- Open the model selector beside the message box.
- Expand Individual models. Search for a model if the list is long.
- Select the checkbox for each model you want to try. Start with two.
- Check the selected model chips and the Comparison mode label. The counter shows how many of the four selection slots you are using.
- Click the message box to close the picker. Write your request and send it once.
- Review each model’s response. Click a model tab to read its answer, or choose Grid view to see the responses side by side on a larger screen.
- To copy one answer, return to Tabbed view, select that model’s tab, and use Copy message beneath the response.
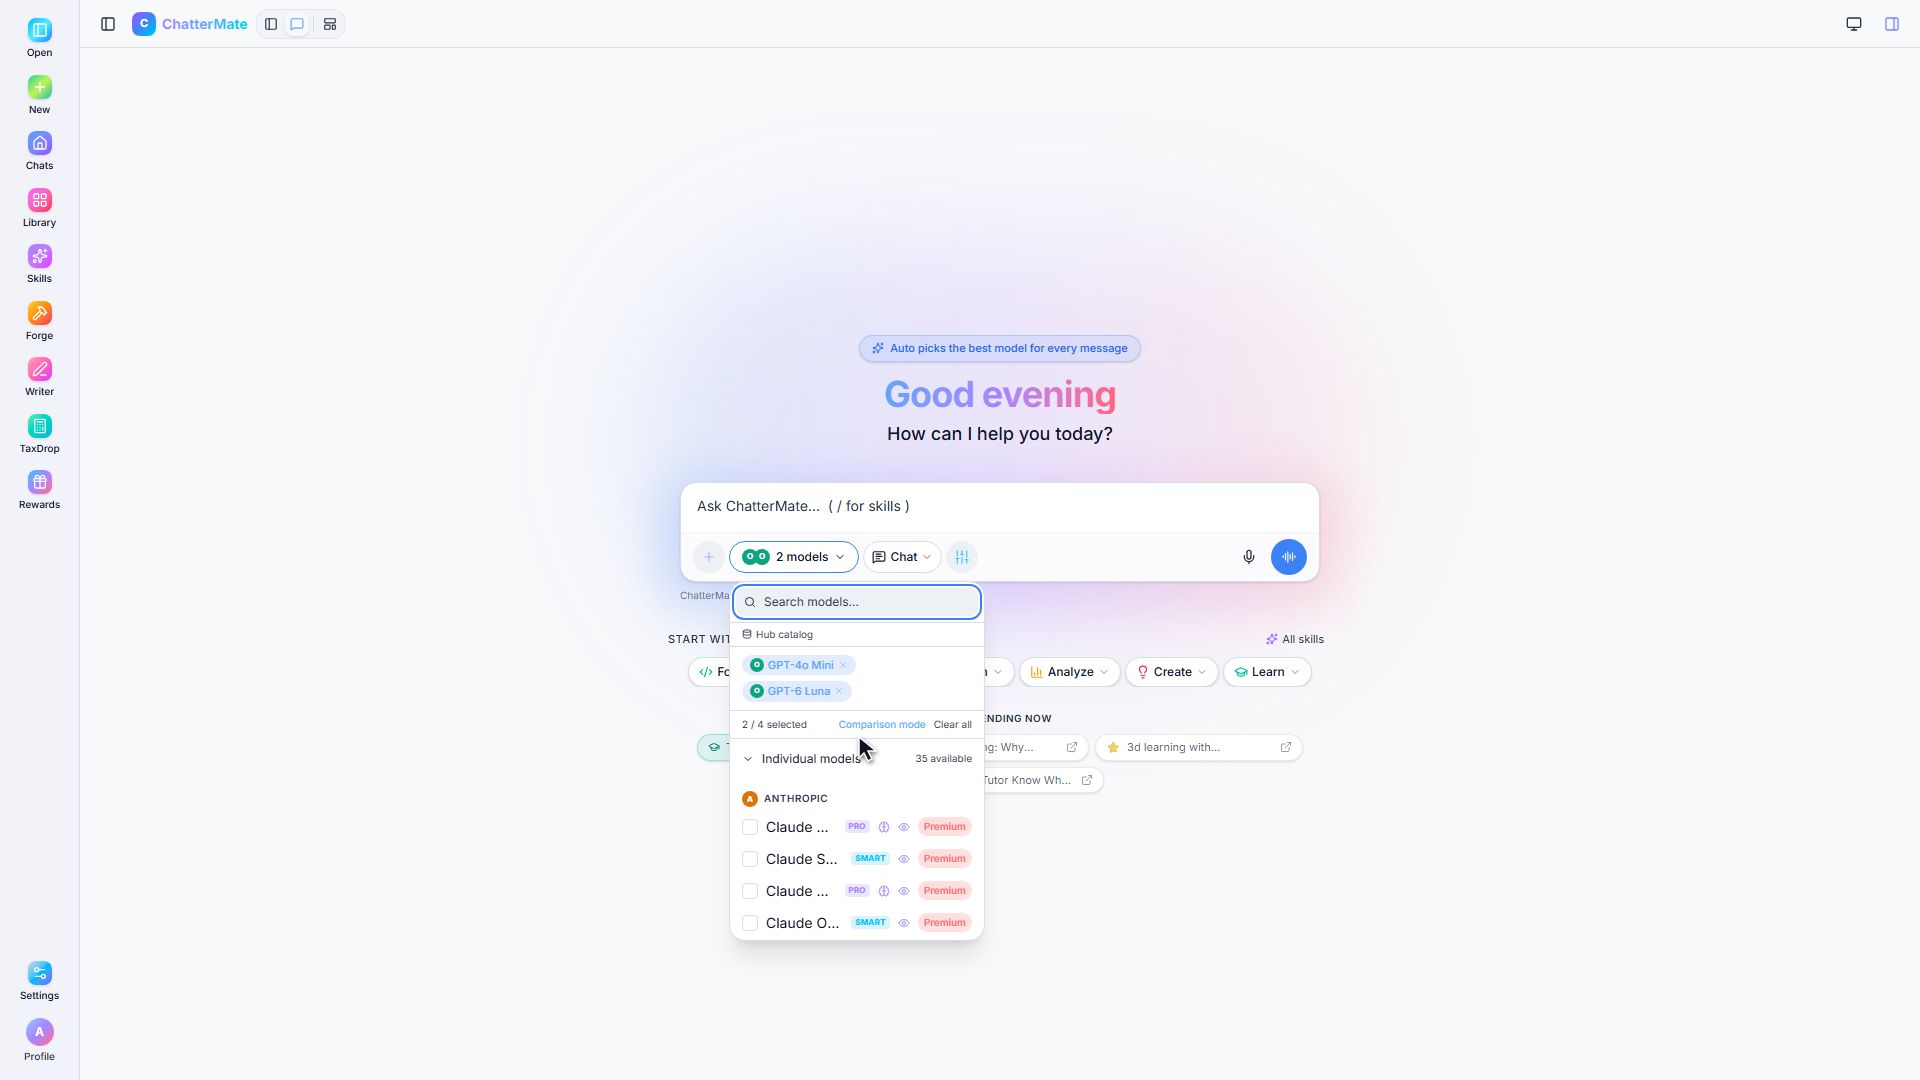
The selected chips confirm which models will receive your next prompt. Model names and availability depend on your account.
Try a simple comparison
Section titled “Try a simple comparison”Send the same clear request to both models:
Suggest three ways to welcome a new teammate. Use one sentence per idea.
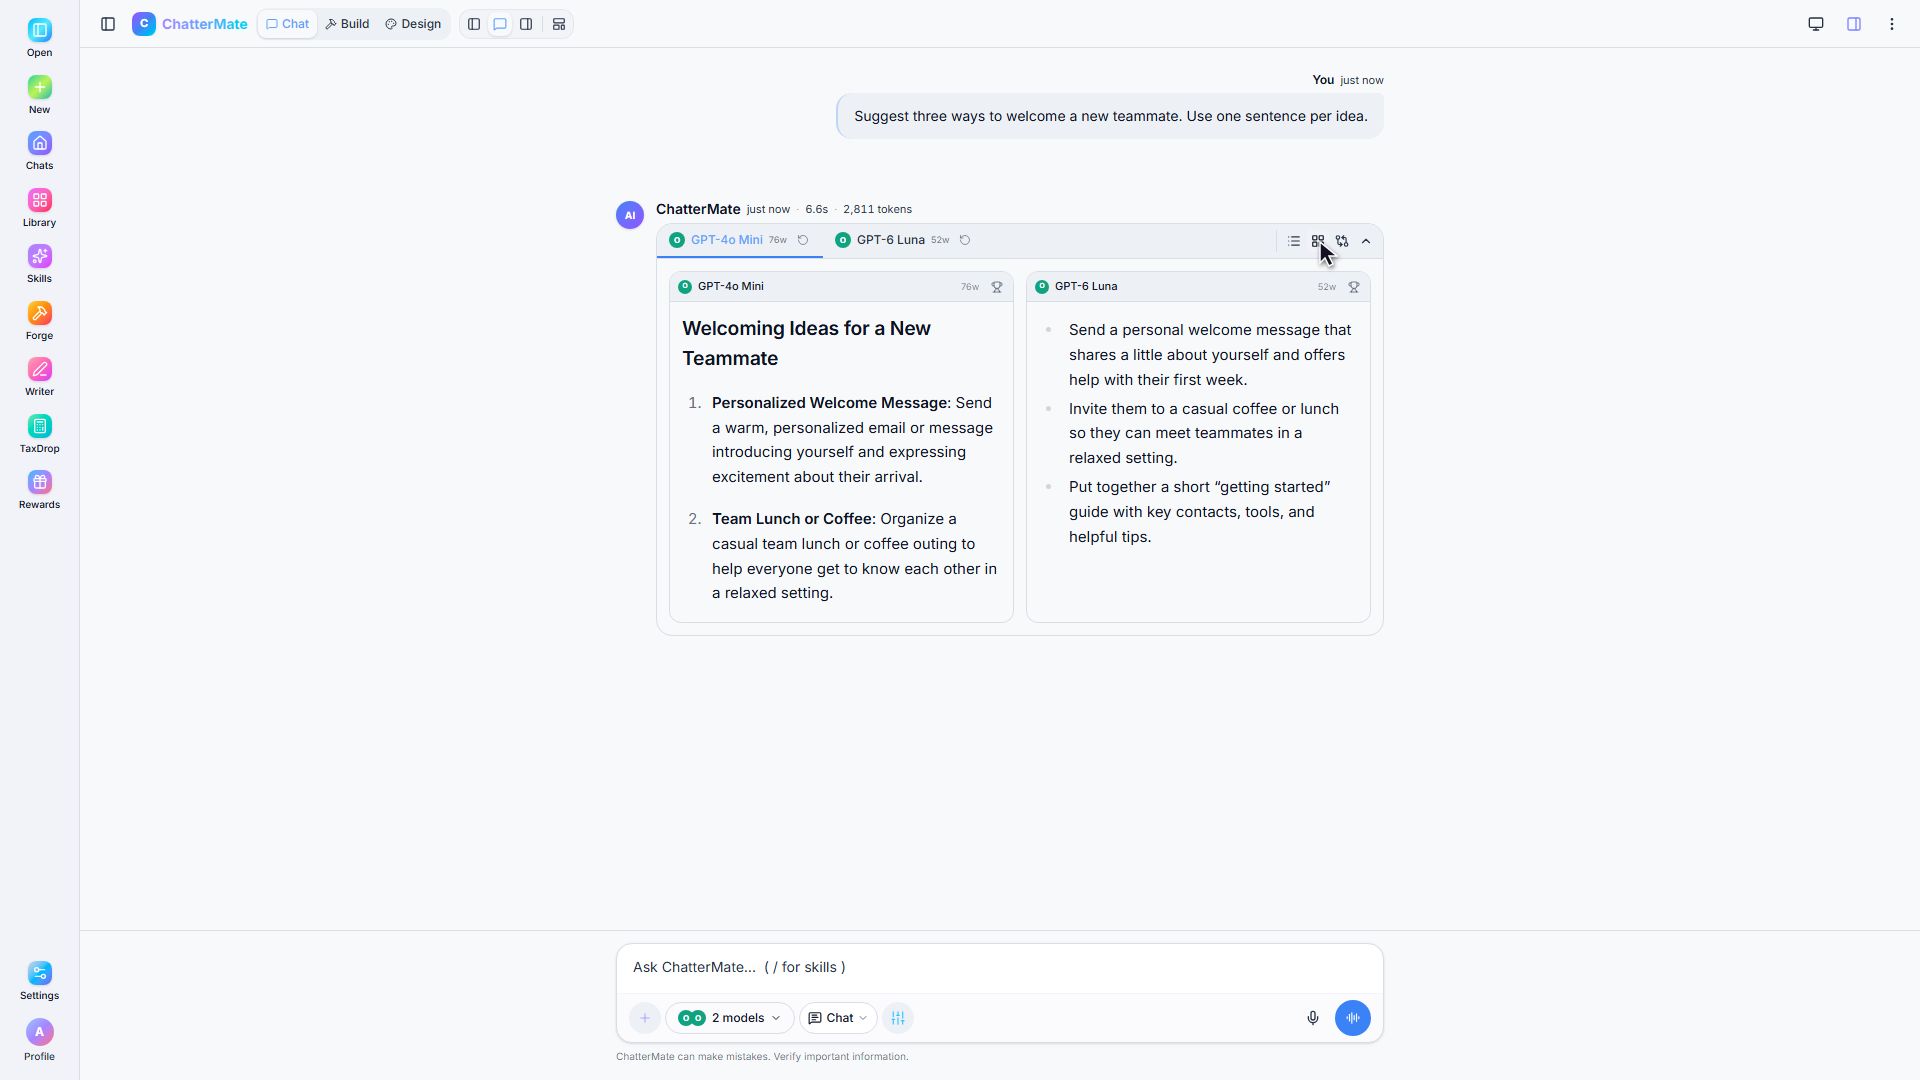
Grid view makes differences in wording and detail easy to spot. Longer answers can scroll inside their panels.
Compare accuracy, useful detail, clarity, and whether each answer follows your instructions. A longer answer is not automatically a better answer. Verify important information before using a result.
Adjust your selection
Section titled “Adjust your selection”Reopen the picker and deselect models you no longer need. You can also remove a selected chip or choose Clear all, then select the model you want for your next request. Check the selector before sending again.
More model replies can use more allowance. Each model can finish at a different time. If one request fails, inspect that model’s error; Retry beside its model tab lets you retry that response.
If a model is missing or locked, check the account shown in your profile and the access message in the picker.
Related: Allowance and usage.